brwatch
Installation
in brief: there is no special installation. Just copy brwatch.exe to a directory with write permission as we need to store an *.ini file and a log file int the same place. brwatch.exe requires PVI development to be preinstalled on the target pc.
With Runtime Utility Center (RUC) it is possible to create an “installation package”, which contains your project binaries but also PVI binaries (*.exe, *.dll). Just copy brwatch.exe to this installation package to get a complete portable version.
Settings
After first start, BRWATCH creates a BRWATCH.ini file in the current folder if it does not exist. To edit these settings use an external editor or the built-in one in menu Options/Settings. Refer to the comments in this file and the PVI- documentation that comes with the installation package of PVI development setup.
ANSL
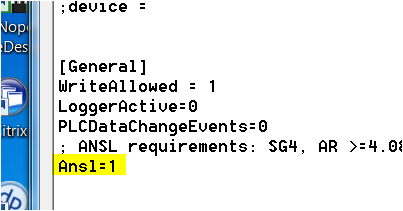
As default brwatch starts PVI with an INA Line. Set Ansl=1 in [General] if you prefer the Ansl protocol instead.

Scan for PLCs in network
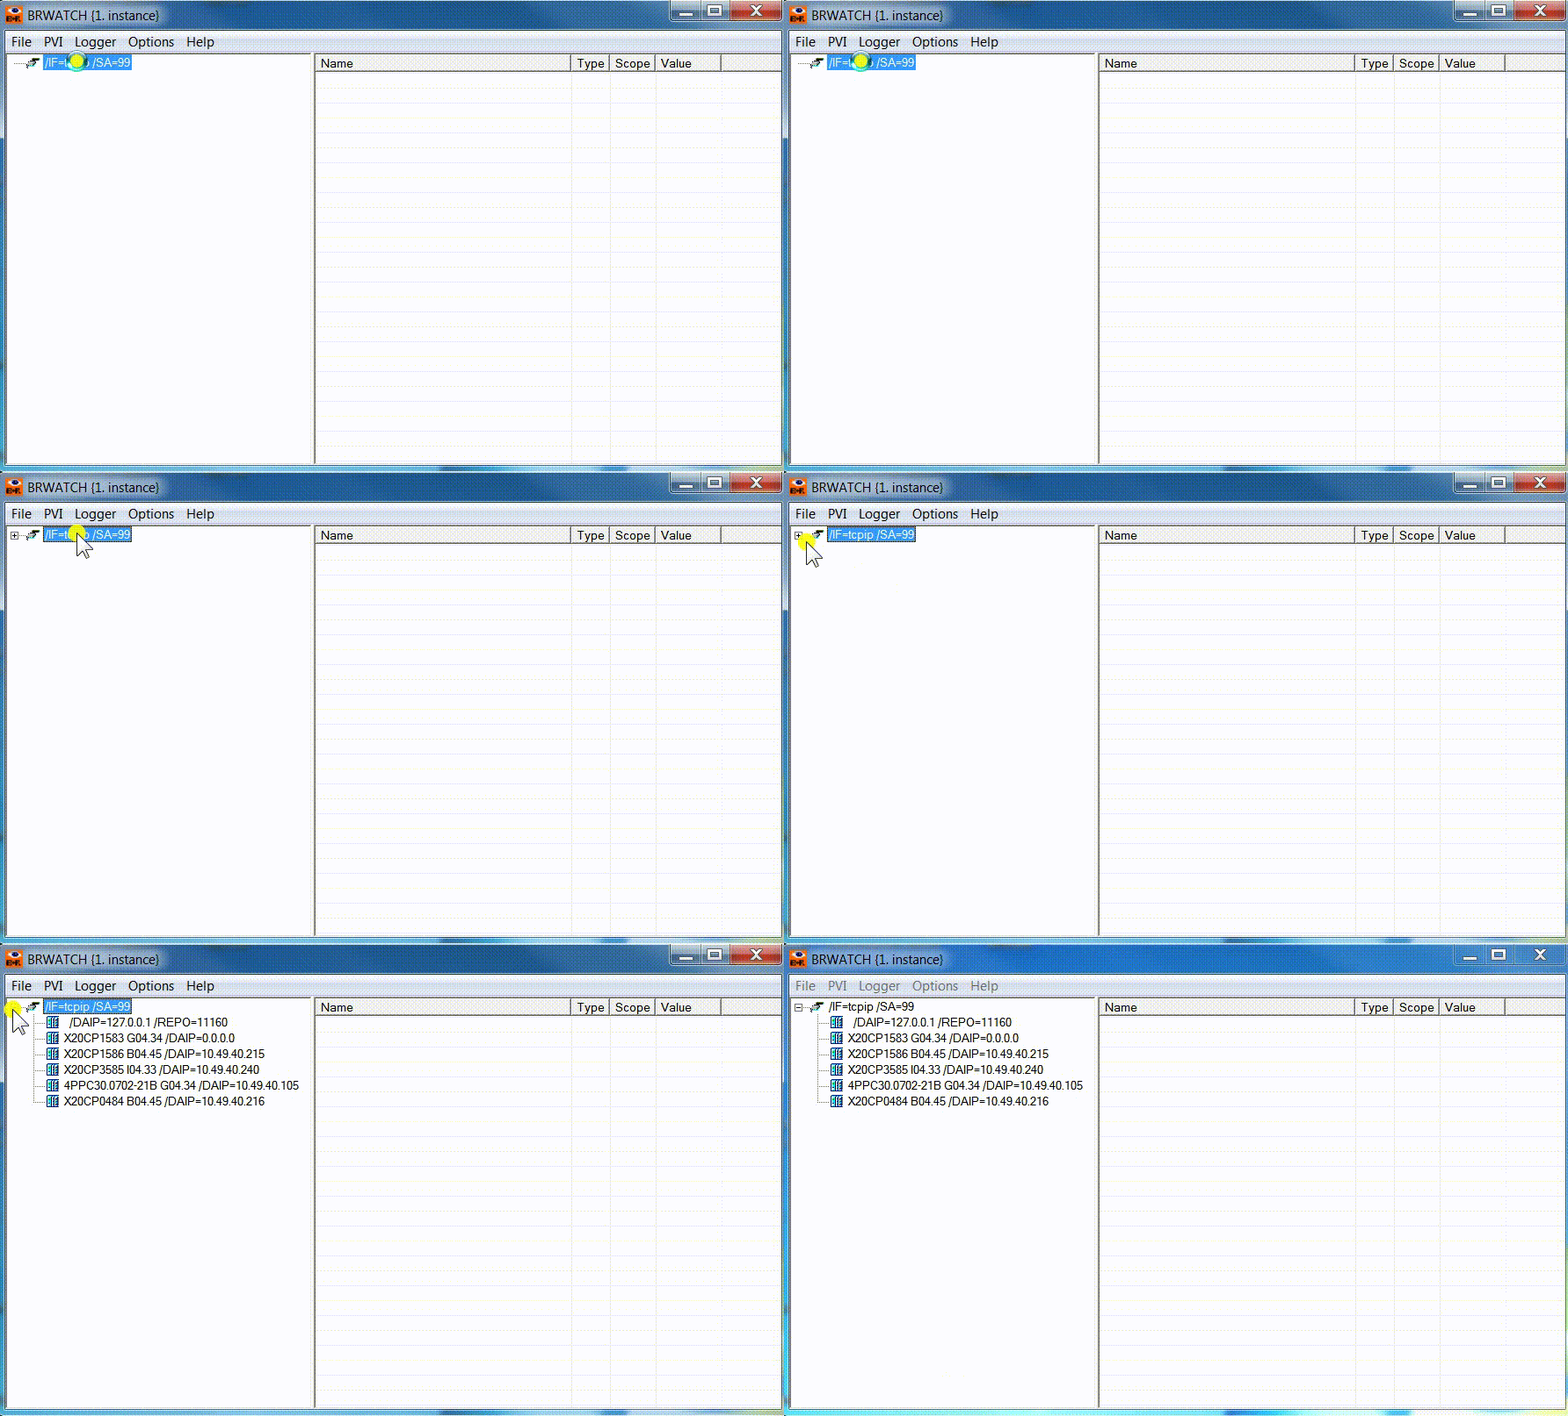
since V1.1 a click on the tcpip device starts the scanning via SNMP and UDP to find B&R PLCs. If SNMP ist not supported (old PVI version, old AR) there is UDP only. CPUs outside your network cannot be found with these methods. The communication settings have to be entered in brwatch.ini instead.

Searching for PV (process variables)
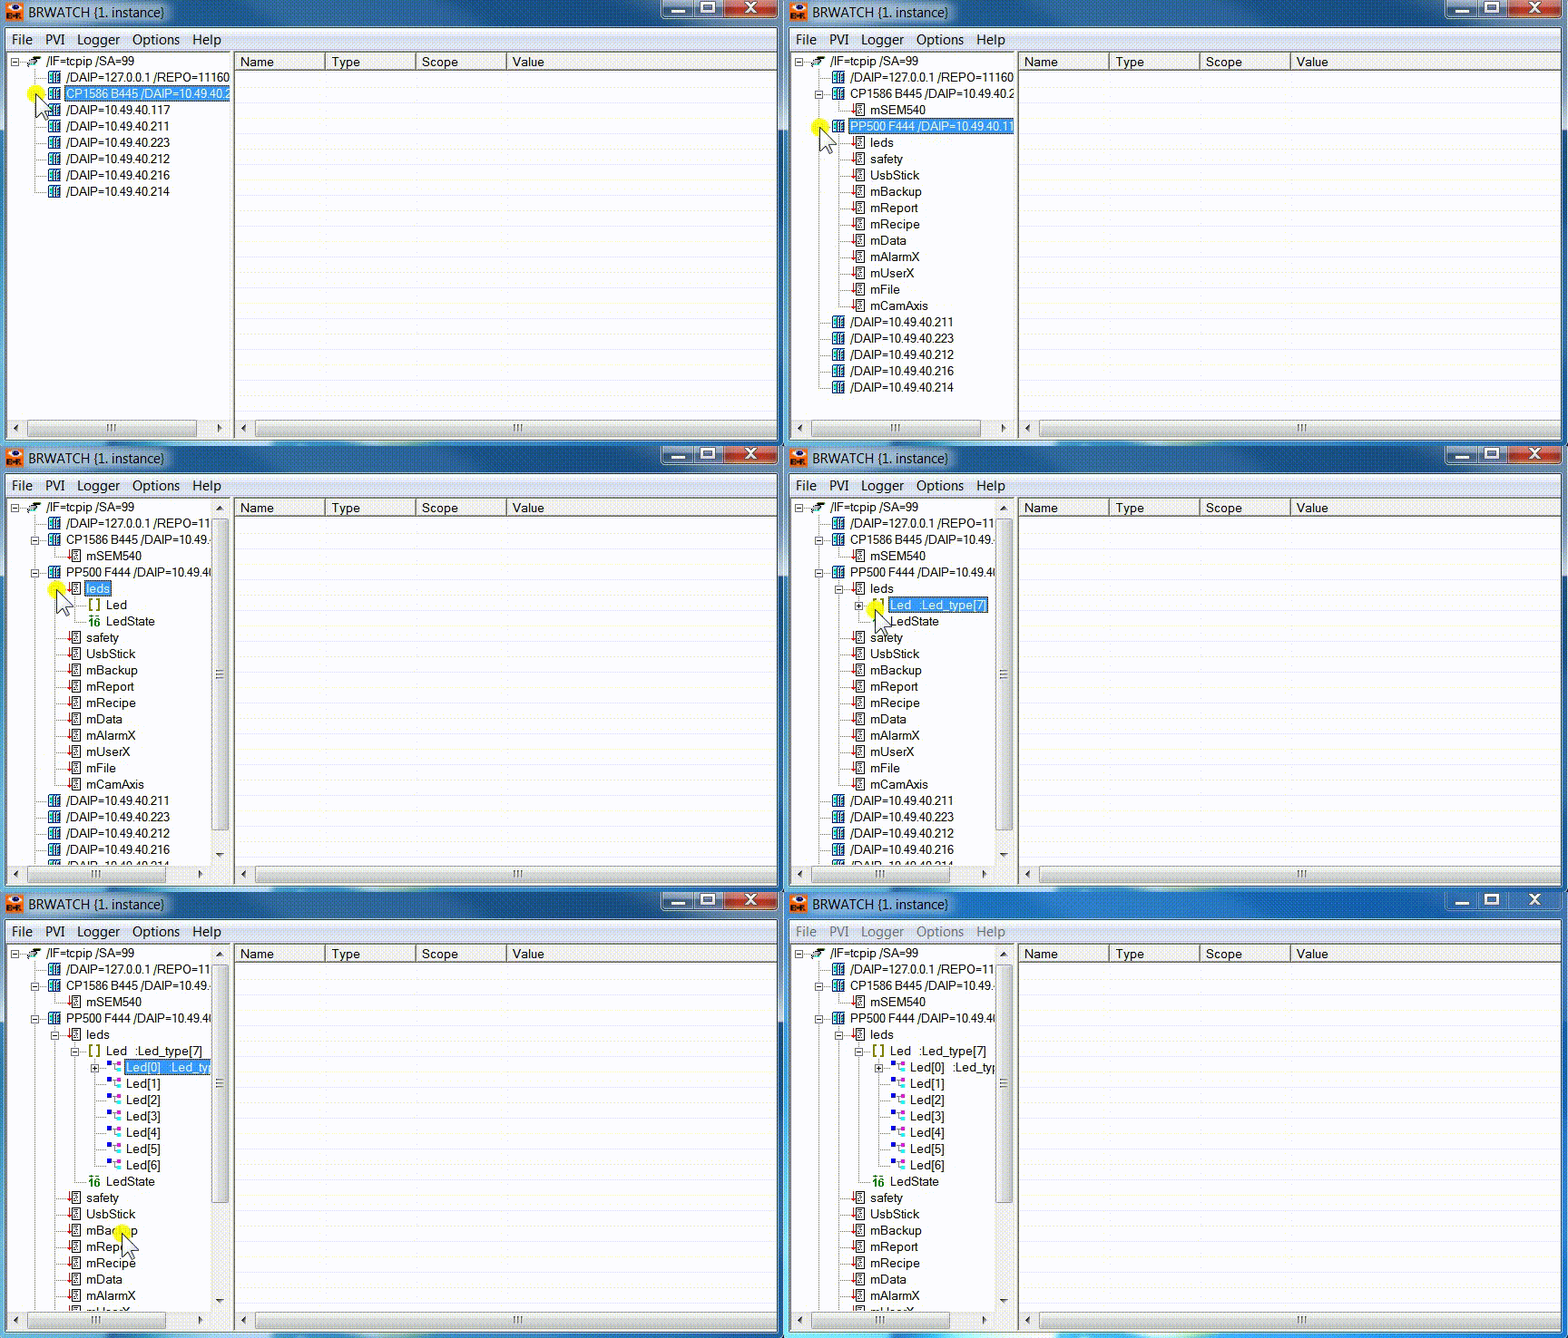
To scan variables, left-click on each node-entry of the tree view control. To watch a selected variable just drag it to the list view control at the right. The entries can be freely arranged by drag and drop operations. If you drag an entry outside BRWATCH, it will removed from the list view.

Change number representation
Right-Click on an entry in the list view opens a context menu for further settings (e.g. Representation of integer variables and strings). TODO screenshot
Edit values
To change a value double click the entry in the list view. The following dialog window enables to enter a new value.
Numbers
Strings
Edit Tasks
Task can be stopped, restarted and executed for a number of specified cycles (single steps)
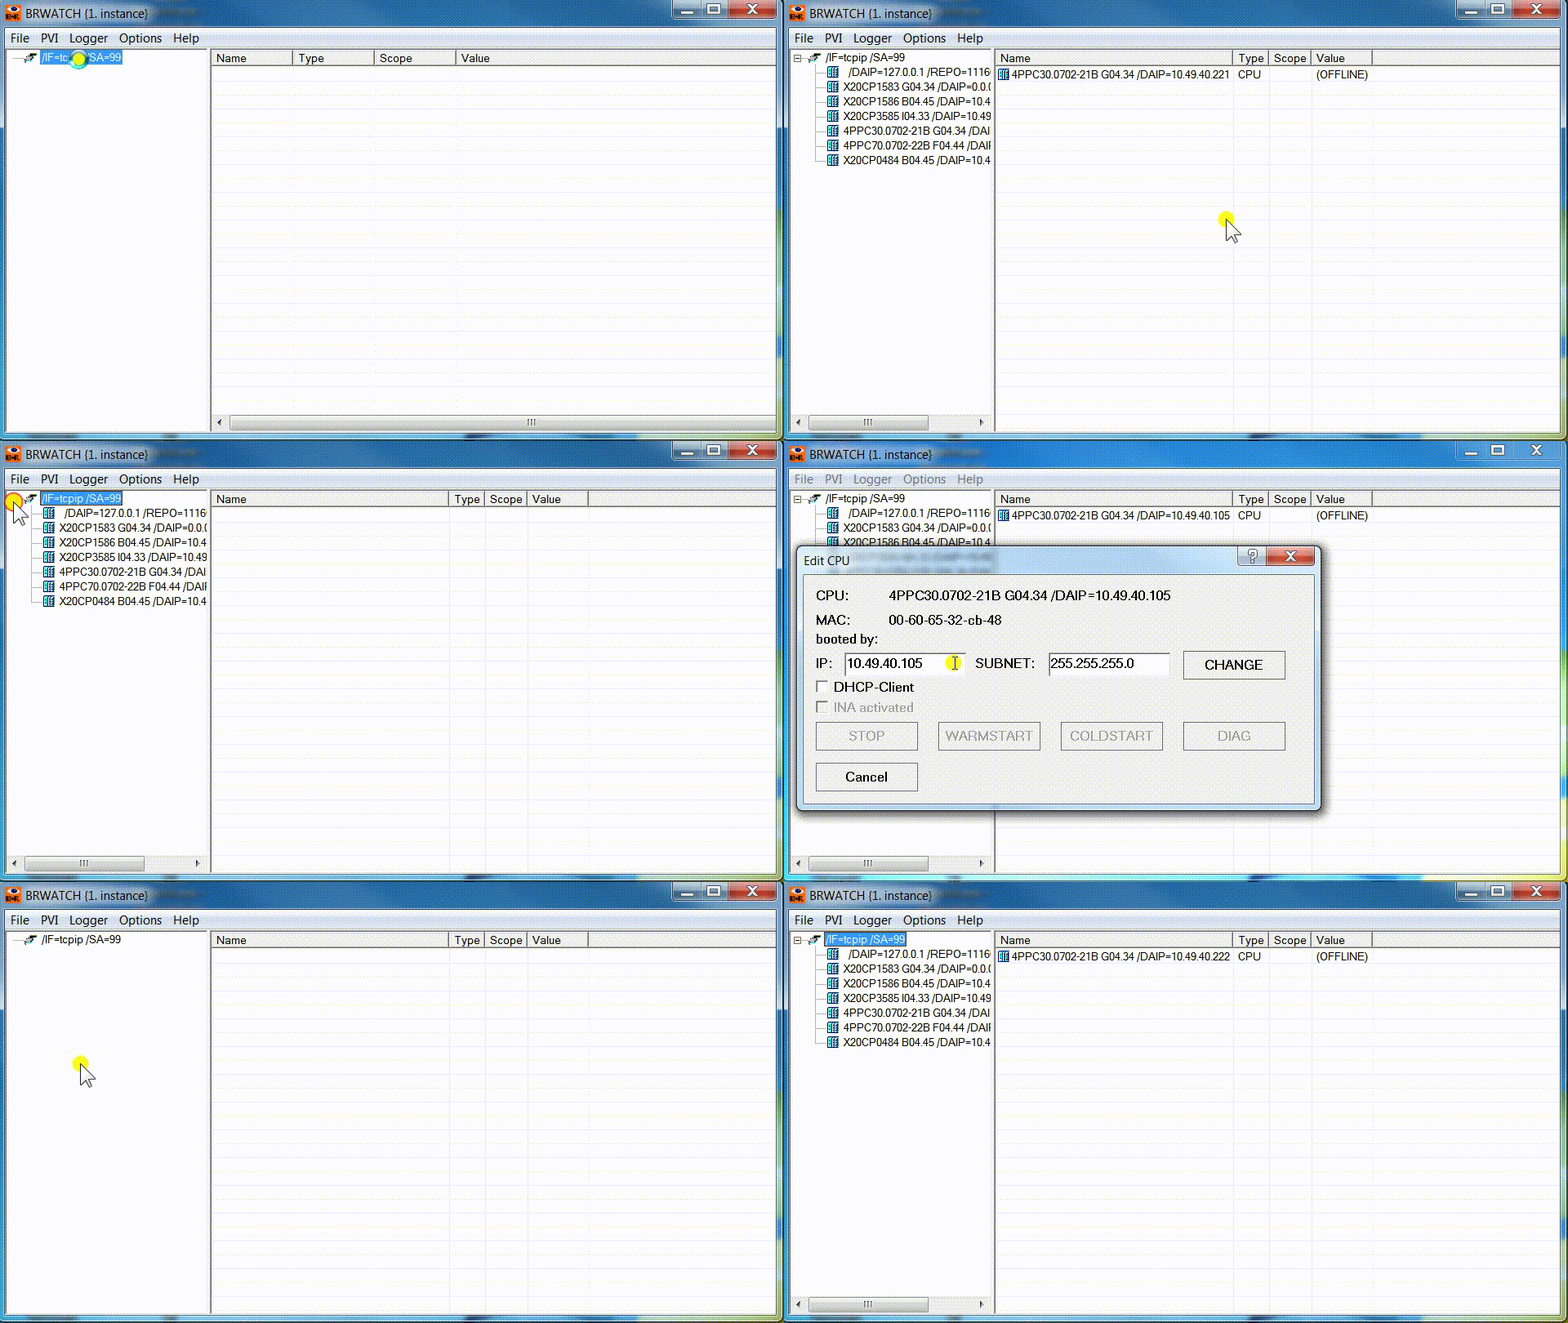
Edit CPUs
You can execute some commands to a CPU:
- Warmstart
- Coldstart
- Stop
- Diagnose
- Change the IP settings (since V1.2)

File operations
You can load/save the watch configuration via “File” menu.
Logger
If the list view contains one or more PV you can write the values into a CSV- File. Microsoft Excel or Libre Office Calc can open this file type for example (or an ordinary text editor of course).
The CSV- file size can be limited. If the entries exceeds this size, the earlier file is renamed (extended with date and time settings) and a new file will be written.
If option write only when value change is checked, a row is written if at least one variable in the list view has changed its content (minimize size). Otherwise, the entered cycle time is for each row no matter if values have changed in a new cycle. Each row in the CSV- file will contain a timestamp. This will come from the first CPU listed in the list view. Furthermore, the CSV- files can compressed via ZIP- algorithm. Extract these files later on by BRWATCH (Menu File) or with a separate tool (WinZIP, 7zip e.g.) Pressing OK will save these settings in the BRWATCH.ini file.
Starting and Stopping the Logger
Menu Logger enables to start the logger or to stop a started logging. If logging has started, the BRWATCH main window is grey colored to signal this state. TODO Screenshot You can save space on your Window desktop by minimizing the window. BRWATCH will then be visible only as an icon in the taskbar. Moving the mouse over this icon gives the option to maximize the main window again. TODO Screenshot Taskbar If you close BRWATCH in this state (e.g. power down your PC) the logger will start in this state again after power up (for long term logging capabilities). Beware; the minimized window state is be saved, too. So if you don’t see the main window after starting the .exe just have a look at the windows taskbar.